Showing posts with label DIY. Show all posts

Thursday, December 12, 2013

Oreo Diabetic Cake

NO THIS IS NOT FOR IF YOU HAVE DIABETES. THIS WILL CAUSE DIABETES!
That's enough for shouty disclaimers. This was my desert I made for our Thanksgiving. I kept calling it Oreo Diabetic Cake and everyone kept asking why I'd make a cake for diabetics when no one is diabetic. My answer... It is so damn sweet you'll get cancer!! 
All you need is:
2 packs of Oreo's
2 tubs of whip cream
a cup of milk
Chocolate Syrup

Easiest thing you will ever do is make this desert. Dip your Oreo's in milk and line the bottom of a 9x13 pan. 
Using your fingers will break the cookie. Jamming the fork will break the cookie. Trying to wiggle the fork in will break the damn cookie. This was the worst part of the whole thing. 
Being delicate frustrates me.
Next take your first tub of whip cream. Using a plastic spatula spread it around
If you push down ( Just a little bit ) some of the Oreo will break off and make the whip cream really delicious.
Now soak more Oreo's and smear more whip cream. Second layer done. 
Let chill for a good half hour and then cut out a piece and drizzle some chocolate over top of it! 


Friday, December 6, 2013

Stuffed Jalapenos

For Thanksgiving I made stuff Jalapenos. These are a favorite of everyone! 


What you'll need:
4-8 Jalapenos (depending how many people you are feeding)
A little bit of cream cheese
Shredded cheese (we always like sharp cheddar) 
Bacon

Preheat over to about 350
Start by cutting your Jalapenos in half long ways.
Then clean the seeds out! Try to scrape them out with a spoon. If you use your nails the seeds will burn your fingers for days. No joke. It hurts.. 
Next spread cream cheese inside of them with a butter knife.
Very lightly sprinkle the cheese on top. Wrap in bacon. I do use toothpicks but it still works without (I tried)
Throw in the oven for about 15-20 minutes. 
ENJOY!!
So easy and they have been a hit every single time I make them. No one ever believes they are that easy. 
Try them and tell me what you think! 

Saturday, November 16, 2013

DIY Glitter Cups!

With us preparing to move I've been doing everything I can to prepare and have places for everything. My bathroom is the most disorganized room in our apartment. It's my fault. I'll admit it, I have a problem with smelly good things. There is my confession. So most of the drawers and cabinets are filled with yummy lotions, sprays, soaps and things like that. I don't have a lot of room for make up stuff in my bathroom. I came up with a simple solution! Make a cup to put my brushes in so I'm not losing them in a drawer of lotions. Also decided to make one for ponytails, bobby pins, and barrettes so I don't have to dig every morning.
Cute right? I originally saw this on Pinterest, here.
But her way didn't work for me! ): ( which is why the purple one looks like crap. )
Here's what you will need: 
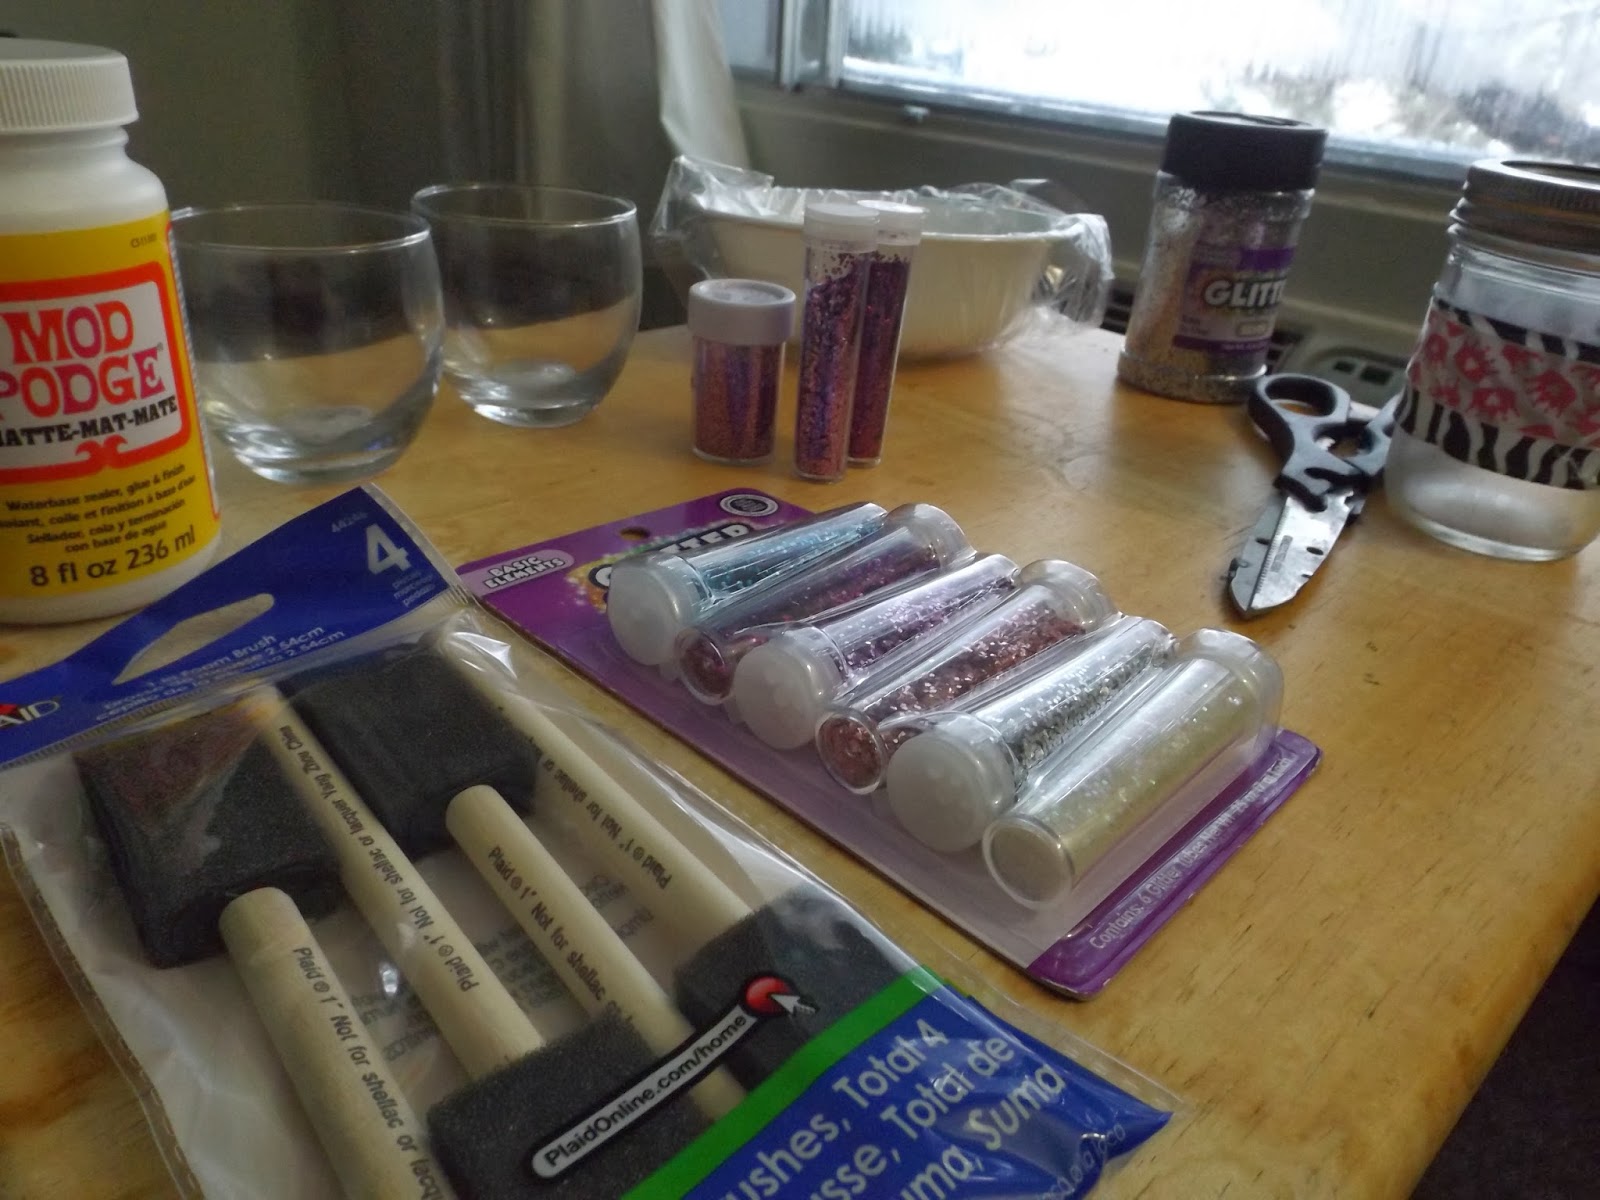
Mod Podge, Brushes, glitter of your choice, a bowl with cling wrap lined in it, and some simple jars from the dollar store or walmart had some for 67 cents! 
I used a mason jar from Brielle's birthday party.
Next pour some ModPodge in your bowl and dump some glitter on it. Like alot.
Stir it up!
Swirl it around the jar.
I just let this one dry and it didn't turn out but my others one I sprinkled more glitter in the jar and it got way more coverage!
The purple one was used for my makeup brushes. The silver one is for my bobbypins and the blue and silver ( my favorite ) is in my room just to be cute :p

I love these! super easy and super cheap!


Saturday, April 7, 2012

Lets color some Eggs!

Easter is practically here! I've been slacking and haven't gotten anything ready yet. No basket, no eggs, and no candy. The day before I decide to color eggs with my parents, hubby, and daughter. I haven't colored eggs in a really long time. It was so much fun. I also wanted to give you guys a couple of obvious ideas that we maybe don't think of. 
 My handsome nephew (: 
 The two that give me my strength 
 My failure ): 
I thought of taping an egg to make a cool design. It worked! he wrapped it around in different areas and it came out fancy like! He's so handsome. <3
1. One trick is to, like I said, tape it. color it first and then tape over it. then drop the egg in another color and it makes a cool almost vain looking design.
2. You can also use waxy crayons to do some polka dots or anything.
3. Most people know about the rubber bands, but just in case you didn't wrap a rubber band or two around your egg and it makes a tye dye looking egg.
4. For this one you might want to help your kids. But use a hot glue gun to draw designs and drop it in the color.
5. Rather than dye use an acrylic paint. Put some paint on a piece of aluminum foil and wrap your egg in it. It gives you a speckled egg that is way cute!
So next Easter you guys have some new ideas for your Easter eggs!
Hope everyone has a happy Easter!

Friday, February 10, 2012

Broccoli Bowtie with Chicken

I found this super easy but yummy recipe the other day! Thanks to Lovely Little Snippets. I did change it just a little bit. But it was still delectable!
What you'll need:
A bag of bow tie pasta
2 cup of frozen or fresh broccoli.
2 grilled chicken breast
2 TBS olive oil (or less)
2 TBS fresh lemon juice
1 TBS Parmesan cheese (optional)
Sea salt and ground pepper

Cook pasta according to directions on box or bag, grill your chicken how you normally would, and boil your broccoli and drain it. Then add everything together, pour your olive oil and lemon juice over, and add the desired amount of cheese and S&P. Enjoy! I love this recipe because it seriously takes like ten minutes to throw together and it's scale friendly!


 And I actually didn't get a finished picture which makes me sad ): But! This was before the chicken. 
On a side not. I found a detox recipe and it sounded so good that I jumped up and made it! I forgot to look at the portions of the ingredients though. So this is a grapefruit, carrot, ginger smoothie. I don't ever recommend it unless you want to shoot yourself in the face (: 

Sunday, February 5, 2012

DIY: Boyfriends Scarf

Another post tonight! Last one though I promise.
I've been looking at all these super cute scarves and I decided to make one of my own with all of them combined. :D 
What you'll need:
a man's shirt M-XL
Scissors
First get your shirt out and lay it out as flat as possible. 

 Cut across the armpit area straight across
 Cut the hem line. Save that scrap for later you'll need it
 Cut slits half way up. I mixed up the width of mine but you can keep yours same length (:

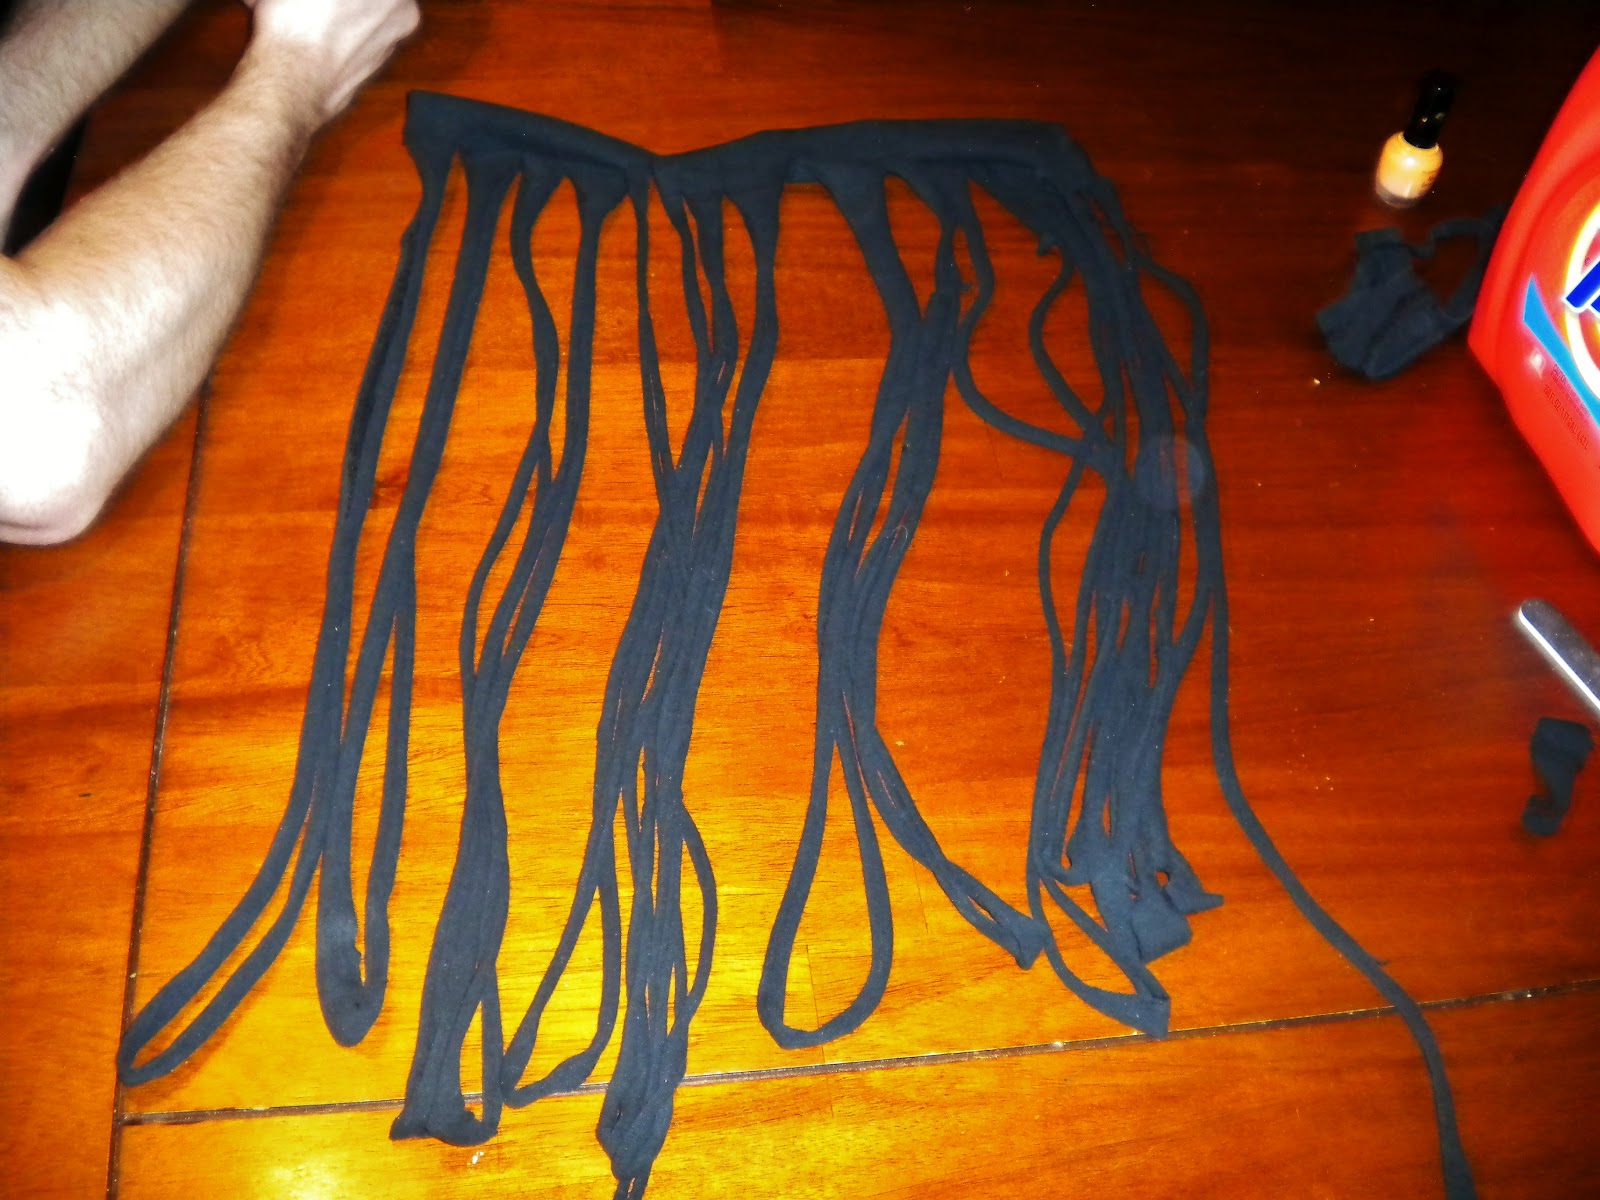
Now cut up those slits until there is about an inch

Pull the ends and stretch them out. 
 I added a braid or two to kind of break it up a little more. Was very cute. (:


Ben came over to watch Super Bowl and help me with some crafts! 
The seam I said to save makes a good babysitter. :p


 Gather all the strands together and tie them with the seam you saved. You can make a cute bow. That's what I did.
Ta-Da! 


Rocking the new scarf (: I'll be wearing it to school tomorrow (: 

Cookie Dough Truffles!

For Super Bowl I made Derrick an amazing treat the was divine!
Egg free, chocolate dipped, cookie dough! Yum! 
I was able to find a pre-made cookie dough without eggs. Which was really nice but if you want to make your own you can find a recipe here ----> http://cafescrapper-scrapsoflife.blogspot.com/2011/02/chocolate-chip-cookie-dough-balls-and.html
I melt chocolate with a pan of boiling water with a bowl of chocolate chips over it. I've always melted it this way. You will never burn it this way! 

 Add a heaping tbsp. of peanut butter
 Get it melted all the way 
 Roll up your cookie dough and dip it all in chocolate, use a spoon or toothpicks to get them out of the chocolate. Put them on a platter and then in the freezer for 20 minutes or so. 
 They should be ready to eat now! I added sprinkles before I put them in the freezer. Makes them cute
 Yum!
Is that good Derrick?

DIY: Marble Nails!

Thanks to my wonderful girls in cosmo, i have become obsessed with Pinterest. Just recently Derrick and I experienced a tragedy. Ever since it happened I've been super crafty and I think it's time to start posting some of the crafts, recipes, and beauty ideas I've seen and tried! The first one I got pictures of was the water marble nails. I love this! If you do it right people will ask where you get your nails done. I got this off Pinterest.
What you'll need:
1 fairly neutral color.
2 or 3 vibrant colors.
1 top coat.
Toothpicks.
A Tupperware with warm (not hot or cold) water
tape. 
 Put the soft or neutral color. It doesn't need a lot of coats because most of it will be covered.
I did a pale pink
 Tape your fingers all around! this will get messy :p
 Add quite a few drops of nail polish. Let it drip off the brush
 Mix it and make a fancy little design, avoid the edges because that area will already be dry.
You will have to add new drops every time because it will dry
 Comin' along (: 
The mess it makes
End product.
Like everything else this take practice! If you don't like it on a nail take nail polish remover and try again. Some look good on me and the others turned out like crap. Just keep trying (: